
|
This swatch had "ideas of its own" and became a holiday gift. One of the projects (yet to be talked about on here) was for the Avast sweater by Jesse Loesberg from Knitty 2006. While I was waiting for the yarn for that project to arrive, I wanted to test out the cable pattern to be sure I was clear on the instructions, and also swatched to get an idea of the gauge I was going to get once the "real" yarn arrived. After swatching the cable, I realized it was the perfect length to be the base of a sweater for Dewey! 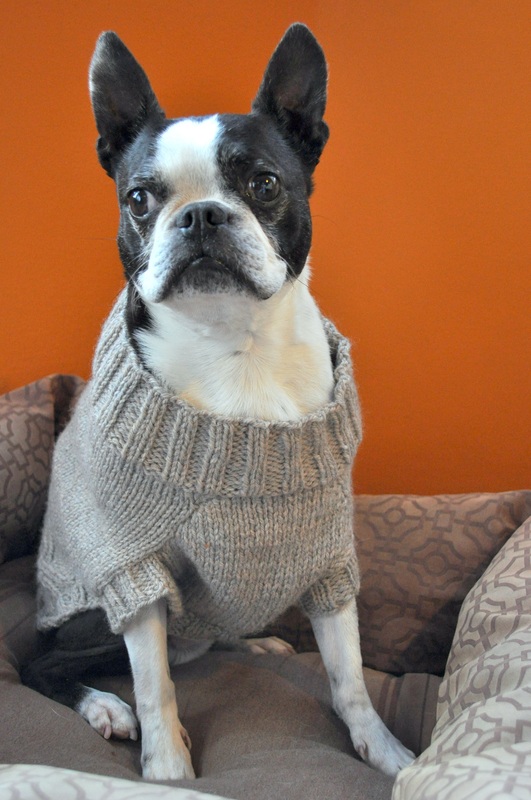 So... using that little cable swatch, I picked up the stitches along the long side and began to improvise this doggie sweater! Dewey is an incredibly affectionate Boston Terrier and he loves to sleep in his bed in front of the heater or in a sunbeam on any given day. He is very gentle, loves the kitties, and finds great excitement in bones or going downstairs to the laundry room or on adventures to the park! 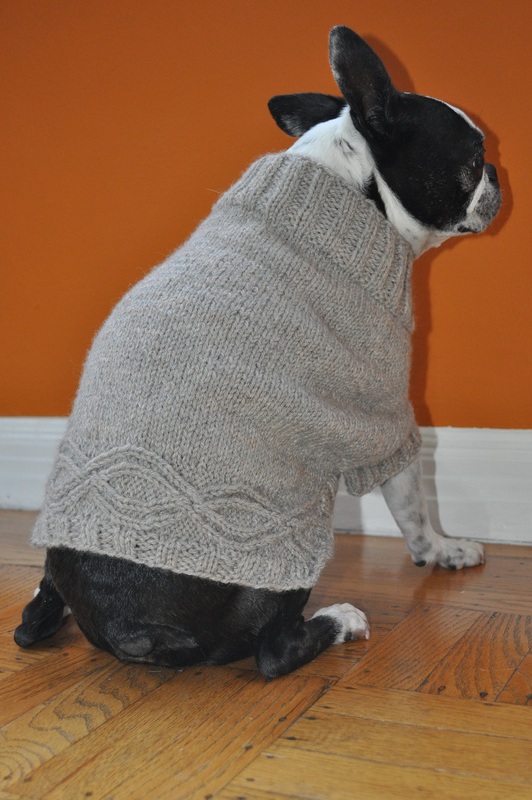 He does not, for the record, like to "sit" on hardwood floors for an extended period of time. His hind-end slips and his little legs slide forward and it's just not a good position for a little dog to take. On especially frigid nights or chilly mornings he likes to wear his sweater and, once he's warmed up enough, he finds joy in showing how good he is at escaping the confines of a sweater! This project can be found HERE on Ravelry for those who might want to remember it for a later time.
Things get hectic this time of year and I feel as though I have been neglecting my duty to report on finished objects. This post is an attempt at catching up on some of that reporting. First, a one row scarf I started in 2010 using Rowan Felted Tweed DK - YUMMY yarn - in the best color ever: Pickle! Ravelry Link HERE. 
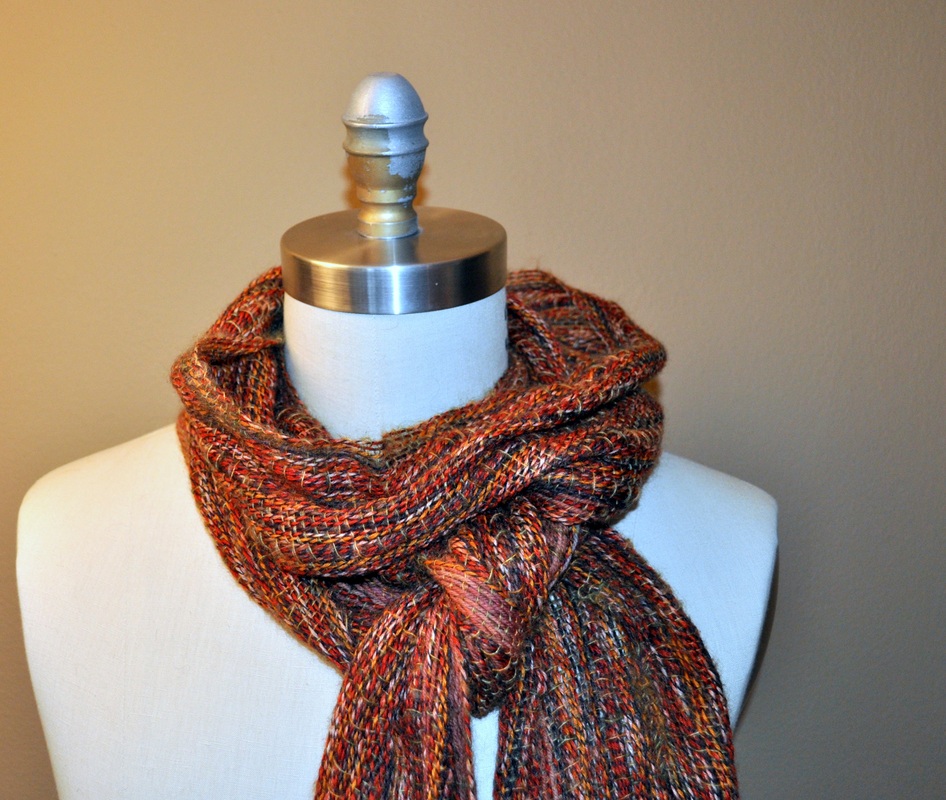
I don't know why it took me so long but this scarf was a battle to complete. I *almost* ripped it out 5 or 6 times... thinking I didn't WANT to knit it. However, this is leftover yarn from a Guernsey finished in 2008 and I only had a few balls of the yarn left... so what else would I do with it. Fighting the urge, it's finally a respectable length and finished, blocked, and beautiful. I'm happy with it although it was a bit boring to knit. Crafty Andy and I got together back in November to weave a fun project using a pattern from Schacht Spindle's newsletter (find the newlsetter HERE). We had a great time making scarves together before he left on his trip out of the country for Thanksgiving. Here's the second scarf I have to show you today (known as "Gratitude" on my Ravelry page). Woven and lovely! 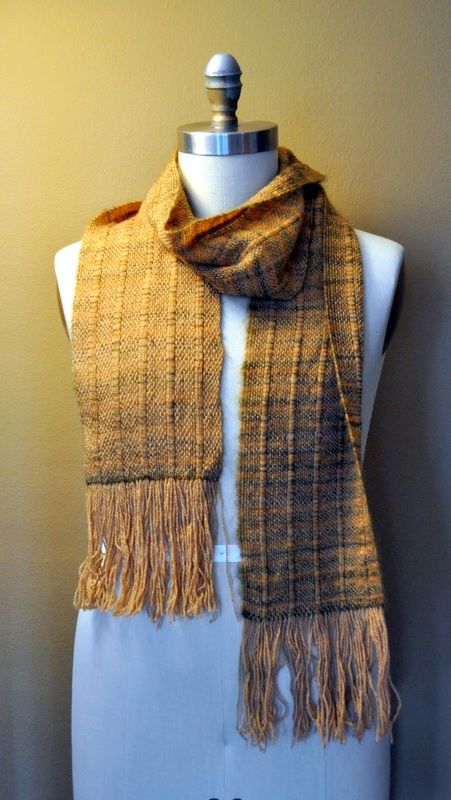
After this scarf, I wanted to make a looooong version so I pulled out my sock yarn stash and found some other goodies to play with. A day later, I came up with this second version... (my 3rd scarf to share)... super lengthy, flowy, and really really soft! 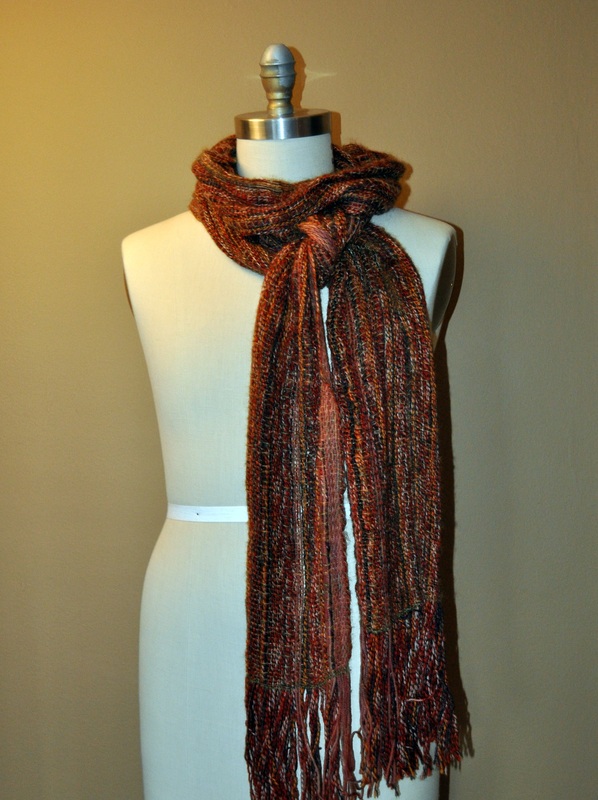
In other news, of course I'm knitting like crazy. Most knitters are knitting like crazy this time of year, as crocheters are crocheting, and crafters are crafting. Lots of projects to complete before the holiday deadlines... and while I'd like to talk about those I can't (or shouldn't) so I will do my best to keep quiet. [for now]. I guess that's it until I can find time to take photos of some of the other projects that are completed... I'll leave you with a sweet photo of Willow (my 3-legged kitty): 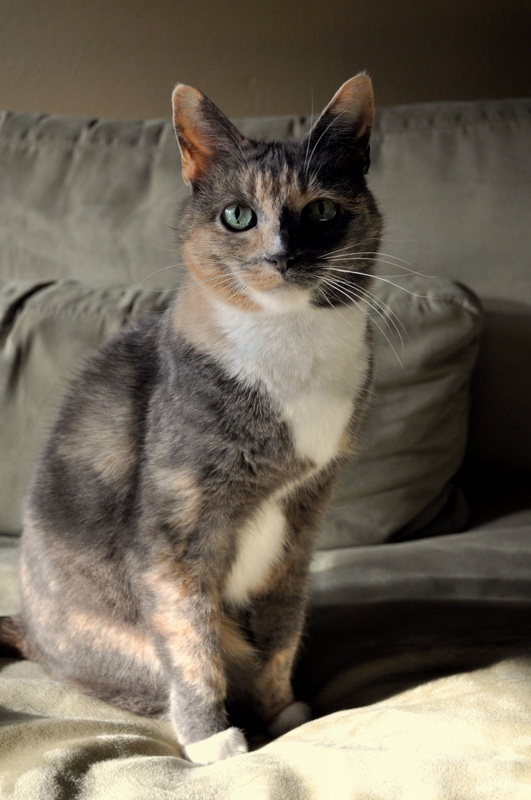
Like what you're reading? Please "Like" on Facebook or "Tweet" on Twitter. Want to leave a comment on the post? I would love to hear from you! 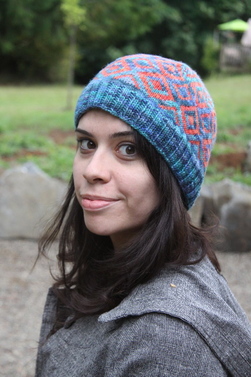 I am pleased to announce the release of Angkor - a hat I designed for Blue Moon Fiber Arts. Offered in two sizes, this project takes full advantage of the saturated color in the yarns offered by Tina and her team. Many people already know the yarns that Blue Moon Fiber Arts offer are AMAZING - and getting to design using her fibers and colors was truly a treat! I hope you'll purchase the pattern (by clicking HERE) and make one for yourself. Be sure to share your project on Ravelry so that I can see your version! 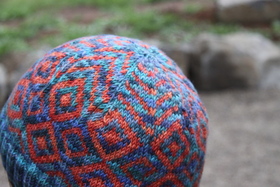  Along with the pattern, I created a tutorial video that shows how to do stranded or Fair Isle knitting. The technique is simple and this pattern is the perfect opportunity to try it out! The video (below) is also in the tutorial library accessed through the VIDEO tab at the top of the screen. The project is now posted on my ravelry page - HERE - and I'm really happy that I can (finally) share the good news with everyone! It was a great experience to work with Tina and I look forward to doing more work for Blue Moon Fiber Arts!
Like what you see? "Like" or "Share" this post on facebook or twitter. Comments are also appreciated. Thanks! (To set the mood for this post, click "play" on this song - "Home on the Range" by Billy Vaughn, 1962.) I'm happy to announce another fun finished project! As you may have guessed by the music playing (feel free to hit "pause" if it bothers you), I finished the "Buffalo" cardigan [#434] from Mary Maxim, circa 1955. A few modifications were needed; the recipient was sized differently than the standard pattern... So, after doing a gauge swatch, I added stitches to the pattern, removed rows to shorten it, and knitted, ripped, re-knitted, re-ripped, and knitted again. This project wasn't difficult - but it had the same blocking issues as the seahorse cardigan. When blocking pieces knit out of 100% wool, it's possible to "shrink" the pieces into shape. (Actually, it's almost easier than stretching them to shape!) - once completed, the sweater fit like a glove, and the recipient was pleased, and so am I! The horns on the buffalo were done using swiss darning or "duplicate stitch" - a video on this technique has been added to the video page. I also added it to this post for convenience. 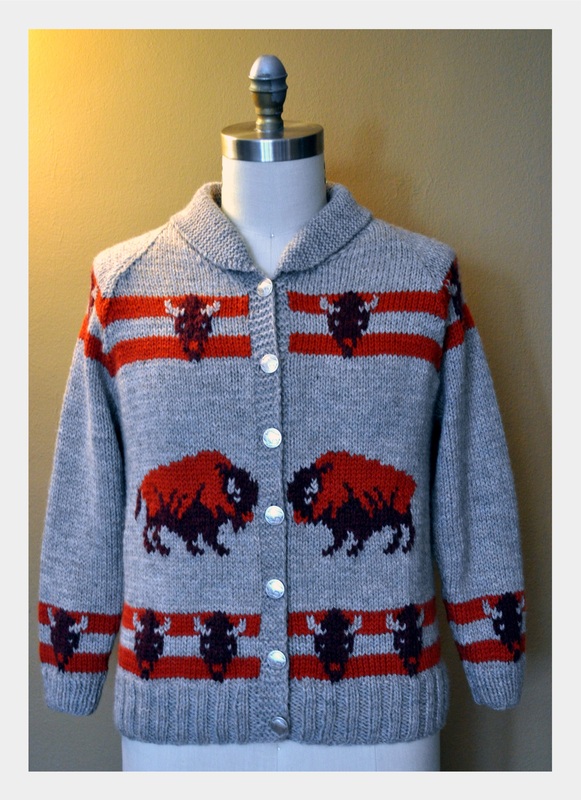 Yarn: Patons Classic Wool Merino (100% Wool) Colors: Natural (main), Paprika (stripes), Cognac Heather (buffalo heads) Needles: US5 (3.75mm) Size: Small (38) with modifications. All the effort in sizing the cardigan paid off; it fits the recipient PERFECTLY! And the buttons... You ask, where did I get the buttons? Why from ETSY, of course! When I first started to consider what buttons I wanted to use on this cardigan, I thought first that I should go to one of the amazing button shops in San Francisco then, realized that it's an opportunity to take advantage of the wide offerings on ETSY.... so, I did a search and scored wonderful buttons from Wicked Wool Gathering. Visit their shop by clicking their banner:  The buttons arrived QUICK and are perfect for this project! I would recommend checking out this Etsy seller the next time you're in the need for cool buttons - she's speedy, friendly, and her shipping costs are down-right reasonable! I ended up having one extra button so, while making the shawl collar, I added a button hole in the back center to make use of that last lonely button. I didn't want it to be all alone without its brothers and sisters... This touch helps hold the collar down, keeps things nice and tidy, and if the wearer wants to pop the collar up it's as simple as unbuttoning the button. If you'd like to see more about this project or "favorite" it on ravelry, you may do so by clicking HERE. 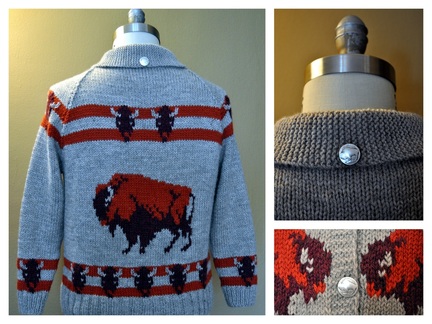 Hints for making sweaters such as this: 1. Use 100% wool. (as mentioned before, it makes blocking easier!) 2. Swatch! (seriously). Now swatch again. 3. Rip (if it's not the right size). It's only knitting. You did it once, you can do it again. 4. Block before seaming. Of course, these suggestions are valid for lots of projects... paying attention to what we're doing... recognizing when something seems to be going awry, and taking action are some of the best rules to live by as we create! Here's the video showing how to do Swiss Darning (also known as Duplicate Stitch): Like what you see? Click the "like" Facebook button or share this post on Twitter with your friends. Thanks!
This sweater was started in April, 2010 just as a diversion from other knitting projects that needed attention. It lingered and hibernated off and on, and was ripped and re-knit a number of times until I found the perfect recipient for it; my friend Anthony! Realizing that the sizing was perfect for him, I got his partner to sneak one of his sweaters out for a quick measure and made some notes to modify the work. I ripped out the bottom ribbing and knit the body longer, then ripped back and started the sleeve over. 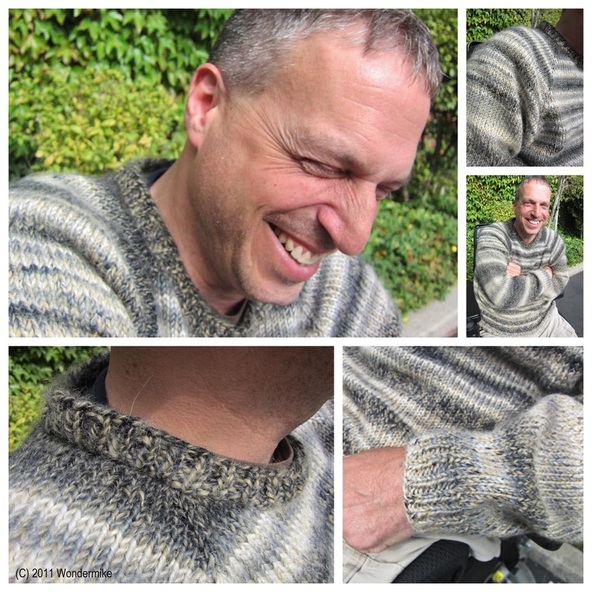 Once I figured out the sleeve, knitting the second was easy. One thing I want to note about this project: The yarn Feza Yarns Cypress Mohair (which, by the way, has NO mohair in it!) is a s l o w self striping yarn... gently spun, fluffy and wonderful to work with... However, when knitting a top-down sweater with self-striping yarn, the size of the stripes changes dramatically at the point where the shoulder and body stop being knit and the sleeve is continued on its own. In the past I have avoided this obvious change in band sizing by doing alternating stripes on my other sweaters. some "in progress" and other details for this project can be found HERE on its Ravelry page. If I were to knit another sweater like the one I just gave to Anthony, using yarn that slowly changes colors causing broad stripes, I might consider alternating two balls of yarn and striping the sleeves instead of allowing the self-striping yarn to be in control. Going WAY back in time to late 2007/early 2008, I made a sweater I called "New Years Resolution" out of a similar yarn called Atunno, and in anticipation of the varying sizes of stripes I used two balls of yarn for the back of the sweater which helped even out the color changes. For example, if a piece was 50 stitches across, I knit 25 stitches with ball A and 25 stitches with ball 2, wrapping the two yarns each time I came to the center (like intarsia). This resulted in a striped fabric with stripe sizing that somewhat mirrored the two fronts (this was a cardigan; click on the image below to be directed to the ravelry page for this project). The striping on the sleeves ends up being in about the same size, and I am pretty happy with the way this one turned out. 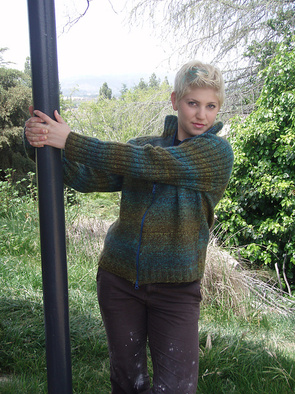 The problem is that for a top-down raglan the piece is worked in the round, removing the ability to work back and forth on the pieces. If anyone has heard any suggestions as to how to improve the stripe sizes on this type of sweater, I'd love to hear! Post in the comments and share your knowledge with others!
Like what you see? Click the "like" Facebook button or share this post on Twitter with your friends. Thanks! The Rialta scarf is an easy-to-knit, fun project that takes full advantage of the gorgeous color changes in Noro Silk Garden. Download the pattern and get a headstart on Holiday knitting! Based on the ripple or wave stitch seen in many, many stitch libraries, this scarf is easy to make with one row of pattern followed by 3 rows of plain knitting heaven! Alternating between two skeins of delicious color-changing Noro makes for an unexpected treat. You'll find yourself knitting on projects like this for hours on end; working to see what color combination will be next to appear. 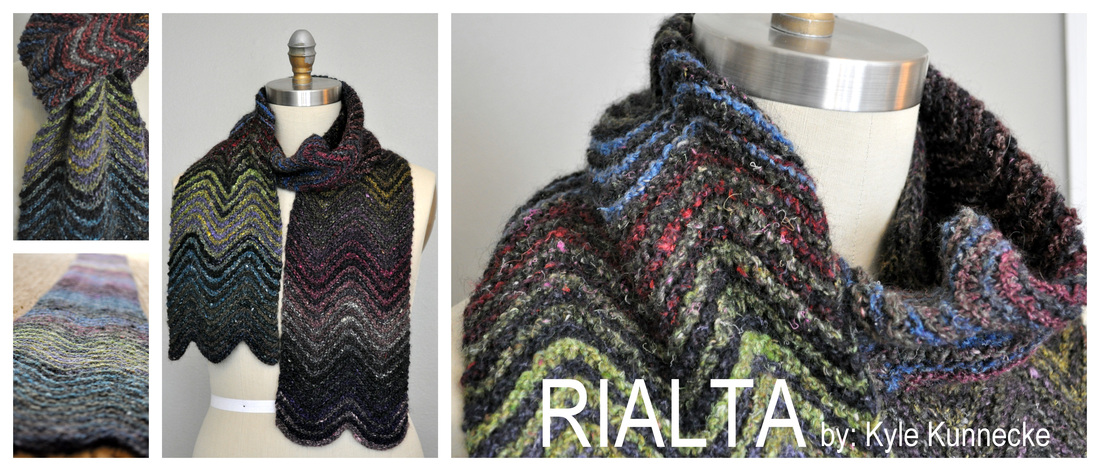 Click the "Download Now" button to download your FREE copy of the RIALTA Scarf pattern!  Here's a helpful hint: When knitting projects such as this using various colors of yarn that changes color, I am careful to alternate the joins in yarn. While working, continue alternating between the two skeins until approximately ½ of each of the skeins are used. Break the yarn of Color A and spit splice a new skein to the yarn tail, reserving the remaining yarn. Continue knitting until the end of your project, adding skeins of yarn as needed. When finishing the project, as you come to the end of Color A's yarn, spit splice the remaining ½ skein previously removed. Using this trick will make the joins almost impossible to detect. If the yarn ends that are spliced are similarly colored, the join will be invisible. I used this technique when making Technicolor (the sweater pictured below) - and used 12 different colors of Noro Kureyon for that project. 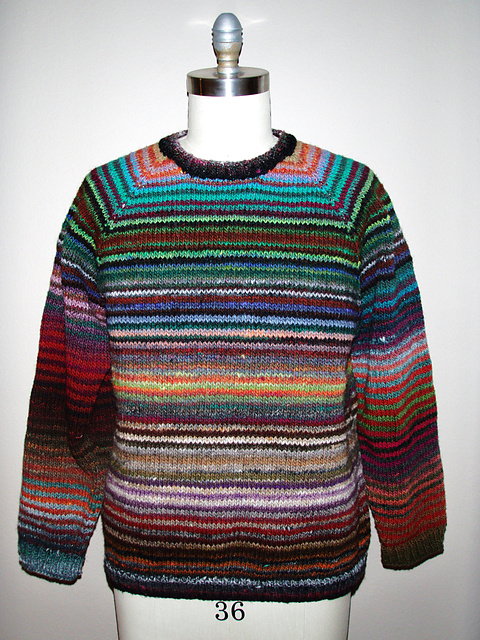 Like what you see? Click the "like" Facebook button or share this post on Twitter with your friends. Thanks!
What does one do when a project "fails"?Not everything can turn out perfectly. I'm OK with learning from my knitting (usually). In the case of the Sideways Socks pattern by Sandi Rosner, I am unsure if it was the pattern or me... but something just ain't right! I re-started the sock a number of times, and finally got to the end of the knitting, only to discover that the "easy" that this sock is (by knitting back and forth instead of on double pointed needles or using magic, loop, etc.) is quickly replaced by an entire sock length of kitchener stitch! If that isn't enough, it's kitchener stitch in garter, then stocknette, then seed, and finally more stockinette! I got through that battle, only to discover that the cuff of the sock is WAY too tight. In the interest of sanity, I decided to call the entire project an "UGH" and move forward with life. The balance of the yarn went into the sock yarn scrap bin, and the toeless sock is credited with probably the first time I have looked at a knitting project, decided that it's OK to let go and move on. When animals are attacked and somehow escape, or even when the dog is finished with getting a bath... the first thing they do is "shake off" the fear and experience they had... Someone once told me that this something other animals do, but that humans internalize bad experiences. I decided that I would "shake off" the bad experience of this project. So, in an effort to be symbolic of the tragic fail, I decided the best thing to do with a misbehaving project is to climb to the roof of my building and hurl it with all my might into the abyss... goodbye, "Mr. Sock that didn't work out"... I'm acknowledging that you were not destined to be a finished object! 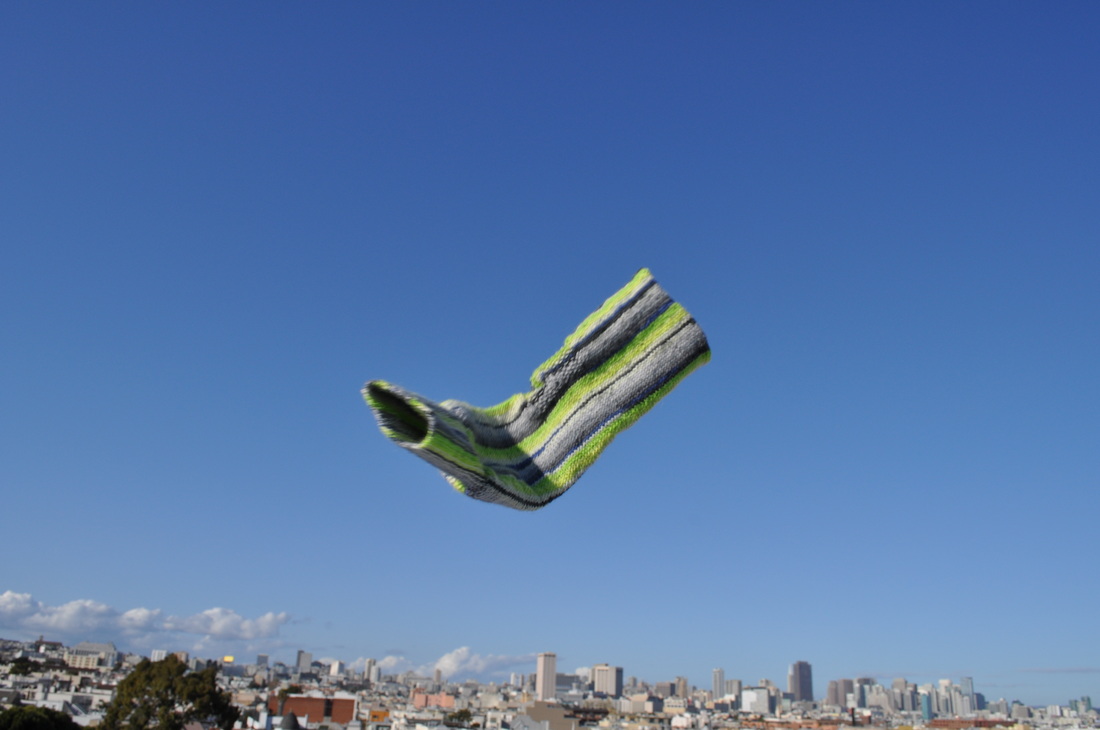 The pattern is the Sideways Socks on Ravelry - for me, it was an UGH but others have knit it and done well. If you're feeling up to the challenge, give it a shot. SISC Installment #2Deep breath in... deep breath out. It's time to start a new project. I got my trusty little drawing kit out for the Self Imposed Sock Club (even though it's not due for another month, I decided that since the first one went so terribly I should just dive in and give myself time to make this pair really count!)  There are only 6 different patterns left in my club - remember, I had planned on doing 6 pairs of socks for the year, and put 1 additional project in the mix just in case... I guess I should have re-selected immediately since the first project was a fail... but instead, I let it go, and feel like I MUST only knit 5 more of he 6 potential projects this year. That being said, if I have another terrible fail, I'll have to jump into the next project immediately. (I really hope that doesn't happen!) 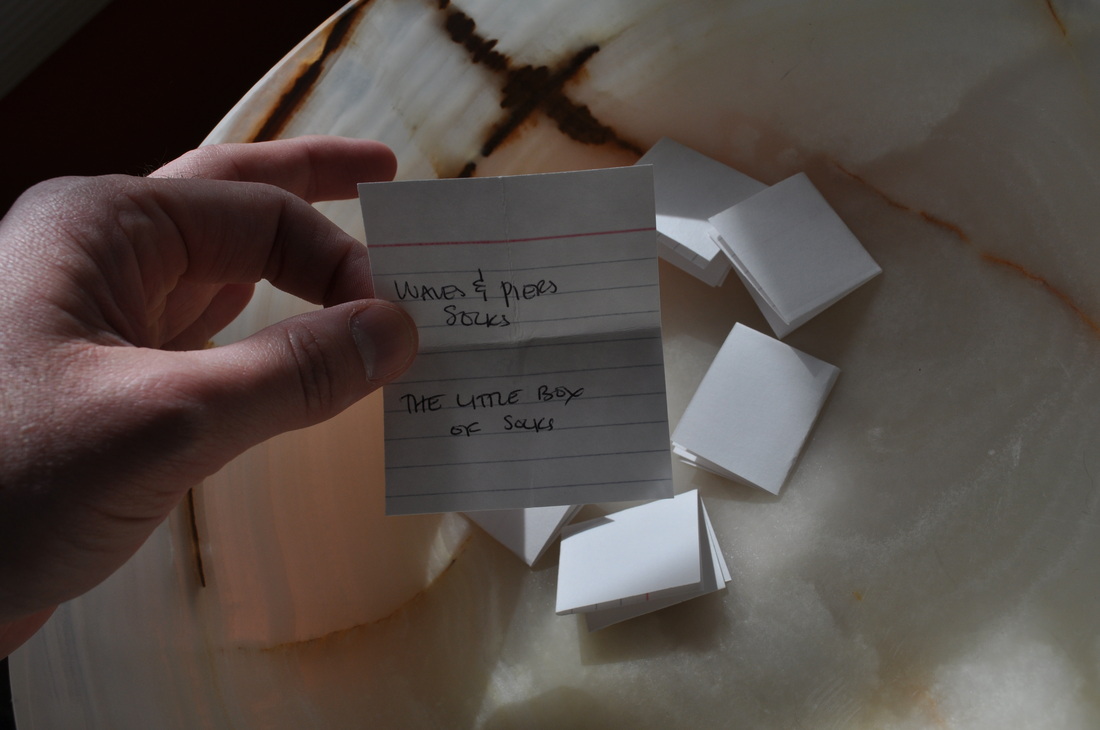 The pattern I chose this time is the Waves and Piers Socks from The Little Box of Socks - It looks like an easy pattern and I love the way it shows off the color changes. I'm using yarn from Wisdom Yarns (Universal Yarn) - the line is called Los Angeles... 75% wool, 25% polyamide (nylon) ... fingers crossed these socks work out! If you are on Ravelry, here's the project link. 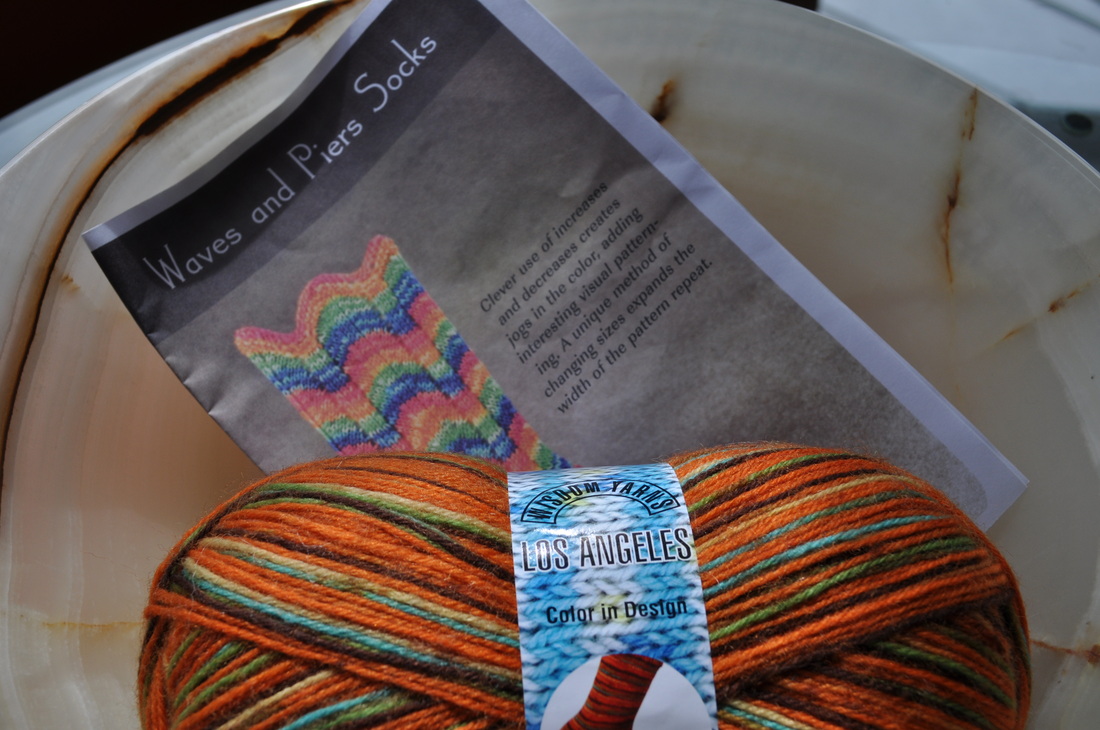 Survey SaysYou'll notice at the top of the website there's a new tab marked "survey" - I am inviting you to participate in a quick (10 question) survey that will be an indicator as to what readers are interested in. If you have a moment, I'd really appreciate your feedback.
Finished Object: Seahorse Cardigan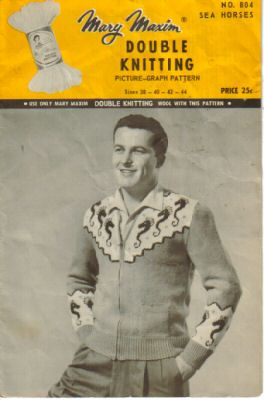 After a lot of research on Mary Maxim, I dove in and got a number of their vintage patterns, including the seahorse cardigan! Using Paton’s Classic Wool Merino, I did a gauge swatch using Jade Hather (77208) for the body, Natural (00229) for the upper background, and Paprika (00238) for the seahorses and accent lines, I cast on in July, 2008! 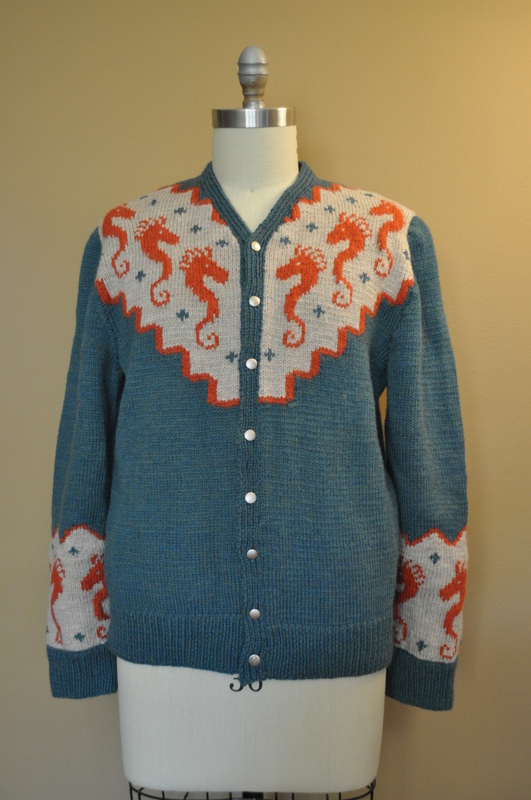 Fast forward to late September, 2009... I finished the chart of one of the sleeves, going back and forth between whether it was all intarsia or if I could "fake" fair isle some of the patterning. I wasn't sure, so I put it away for a while. In mid October of 2010 (yes, a YEAR later) I picked it back up and took the sleeve with me to San Francisco and finished it on the 200 mile drive north to Weott for the Humboldt Redwoods Half Marathon. That sleeve was finished, and I was able to start the back on that trip! 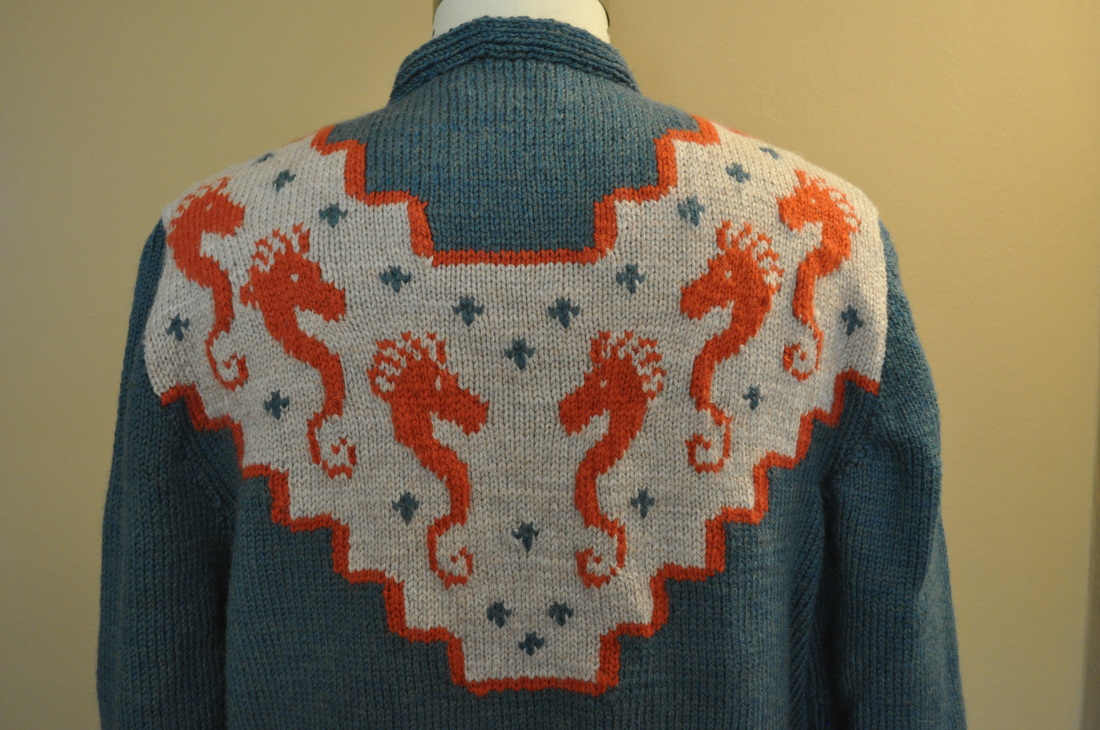 The back was finished in early January, 2011, and a week or two later, I finished the second sleeve. Because all this intarsia and graph based knitting isn't torture enough, I decided to cast on the two fronts at the same time. At this point I was really wanting to get the sweater completed in time for Stitches - and on January 13, 2011, it was finally completed! I assembled the sweater and found the perfect buttons to complete the piece. All but one button came from Britex in downtown San Francisco. The antique seahorse button I used is from “Granny’s Thimble” - a pretty fun source for buttons! Check her out: www.grannysthimble.etsy.com As soon as the weather cooperates I'll get photos of me wearing the cardigan -- 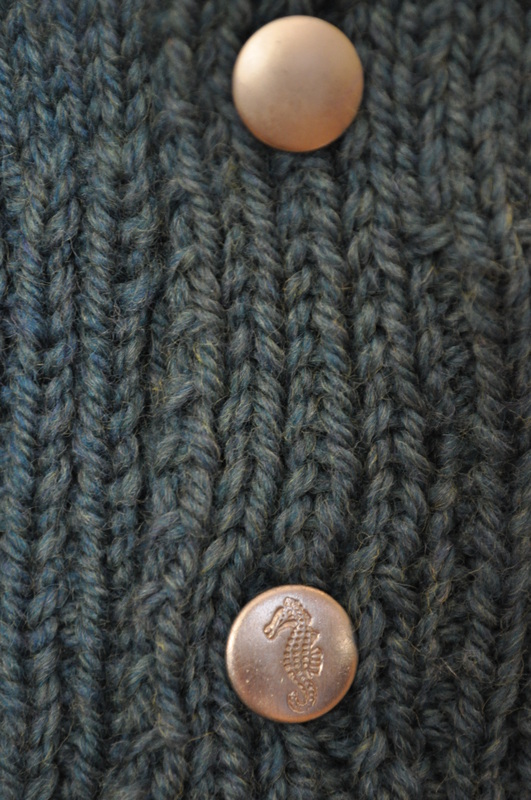 I'm now tackling another Mary Maxim pattern... the buffalo sweater!! (and I promise myself that I will not procrastinate as much this time!!) Stay tuned!
I have been working hard to complete lots of projects that have been lingering on my knitting needles. Fellow knitters, you know what it's like to have a bunch of projects incomplete and in various stages of frustratingness. Since my move to San Francisco, I have become quite focused on completing the projects I started, and being well-planned when it comes to starting new ones. That being said, I am happy to share with you, Carlito; a recently-completed cabled cardigan, and Cure; the hat pattern I designed for HIV/AIDS awareness! 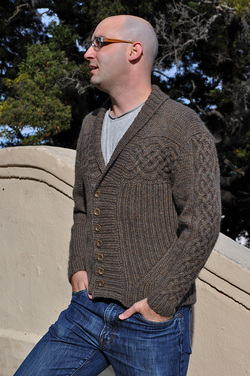 Carlito Cardigan by Matthew Gnagy Yarn: Berroco Peruvia Began: May, 2010 Completed: December, 2010 Visit this finished object on Ravelry: http://ravel.me/kylewilliam/cc 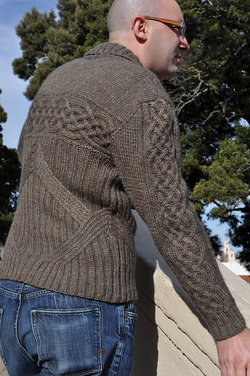 I bought the yarn for this project at WEBS during our real life visit May, 2010 , and cast on at the Men's Spring Knitting Retreat 2010 in Easton, NY. The project is rewarding, interesting and beautiful... My only notes are: 1. Be sure to center the pattern when picking up the stitches on the back panel - it’s important to divide the cable panel in half then half again (use safety pins or something to divide) and evenly distribute the stitches - otherwise you’ll end up with an uneven back and it’ll look icky… like mine did… and I had to rip it out and re-do it! 2. The length to the waist is shorter than I thought it would be. Because of all the ribbing and traveling angled details, it could stand to be a touch longer. If I were to re-knit this again I'd probably either knit it a little longer or not bind off at the bottom (leave those stitches live until it's assembled to ensure proper length. Contrary to popular belief, cables are not difficult. The only issue I find with this style of knitting is that it takes concentration and moves more slowly than other pieces I like to knit. That being said, the reward of completing something such as the Carlito Cardigan makes the hours of knitting invested quite worthwhile! Cure Hat Pattern Released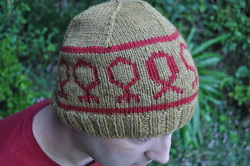   A portion of the proceeds from sales of this pattern will be donated to help fund HIV/AIDS Research.
$4.00 (.pdf pattern download) Have life saving information to share with someone the next time they ask about the hat you’re wearing. Using this pattern, it’s easy to create a custom hat supporting HIV/AIDS awareness! Check out the fact sheet at the end of the pattern to learn more about this disease and what you can do to help reduce your risk. Knit in the round, this hat features two motifs - the virus and the ribbon. As the artist, you get to select the quantity and order of these motifs! I was lucky enough to get to go to Imagiknit's 8th anniversary sale in San Francisco back on September 11, 2010 - and that's where I picked up 3 skeins of yummy Punta Yarns Mericash Thousand Colors in an amazing pumpkin orange. I mixed it with a natural undyed yarn in my stash and started knitting away on Jared Flood's Alberta vest. It didn't take that long to work my way up to the very top of the vest. I ended up binding off the shoulders and seaming them together. Then, it was time to steek. I started by sewing a white yarn up the center of the steek, then I used a different colored yarn to crochet the anchors at the armholes and the v-neck. 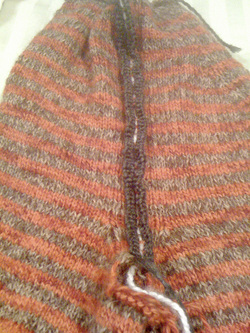 Then, after a long day at work, I gatherd my knitting, picked up my reproduction vintage looking super pretty sissors from Laci's Needlework, took a deep breath, then did what most knitters fear... I cut my knitting! 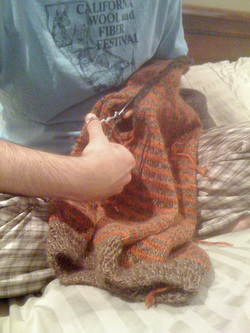 slowly, stitch by stitch, the arm holes opened up, the v neck opened up and the blob in the round funny looking piece I had made blossomed into a vest! I PROMISE that steeking is not hard. It will not kill you. With patience and planning, it can turn your knitting projects in a whole new direction. I am excited about my next steeking project now! 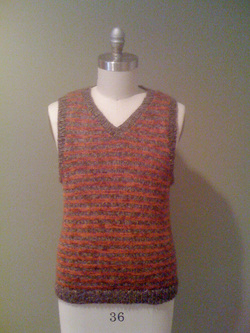 Here's the vest with its arm and neck edging - freshly finished - the steeked bits are carefully tacked down on the inside - and I'm pretty happy with this finished object! On October 17, 2010, my friend John and I set off to run the Humboldt Redwoods Half Marathon! We had been running and training for months to get to this day - and John was a trooper; his knee was hurting a bit the week before, and seemed to be better as the day approached. We talked about the realities of a half marathon and decided that we'd work together to get him through the race. John's husband Chuck joined us for the trip and was so kind with his cooking and hosting. We stayed at a friend's house the night before, and got to spend the night in front of the fire. The morning of the run, we got dressed, headed out and felt pretty good. The first 6.5 miles were pretty easy, running through the most amazing scenery! As the miles increased, so did the pain, and it went from running to walking, to limping... and while the finish may not have been the most spectacular in history, John and I finished the run - 13.1 miles - VERY proud of the hard work we both put in... the best part? We are already making plans for our next runs!! 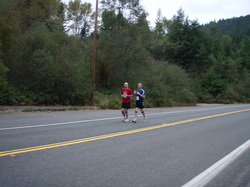 That night, John couldn't really walk on his own - I remember feeling this way after the L.A. Marathon - the next day we got him some crutches, and on the way home, Chuck brought John, me and their adorable Boston Terrier Dewey to the Chandelier Tree in Leggett, CA! It's thousands of years old and in the 1930's the "drive thru" was carved... What a fun adventure the weekend was - I am very lucky to have such incredible friends in my life! 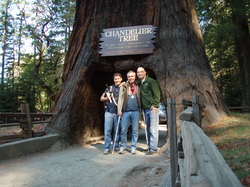 And of course, I spent a few minutes under the Chandelier Tree knitting... yes - knitting under a @2,400 year old tree... why not! 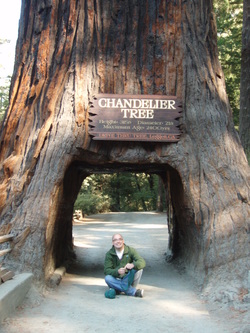 We did other fun outings as well, including the spaghetti dinner in Weott and just up the road the amazing rock shop - which was also a museum - and INCREDIBLE! It's probably the main reason I want to go back to this run - next year I want to do the full marathon - and go back to the rock shop and YES take photos of the rock shop so I can share it's wonders with all my friends!
|
Archives
July 2023
Categories
All
|
 RSS Feed

|
ExploreFor Fun
|
Support |
Connect |
© 2006-2023 Kyle William. All Rights Reserved.